
That little line snaking its way across your ceiling isn't just a cosmetic flaw. Think of it as your home trying to tell you something. When you're looking to repair drywall ceiling cracks, getting a professional to take a look first is always the smartest move. It's the only way to know for sure if you're dealing with a minor settlement issue or a serious structural problem. Ignoring it? That can turn a simple fix into a homeowner’s nightmare. For professional results you can trust, call All Coast Painting. Our licensed and insured teams will ensure the job is done right.
Why You Shouldn't Ignore Cracks in Your Ceiling
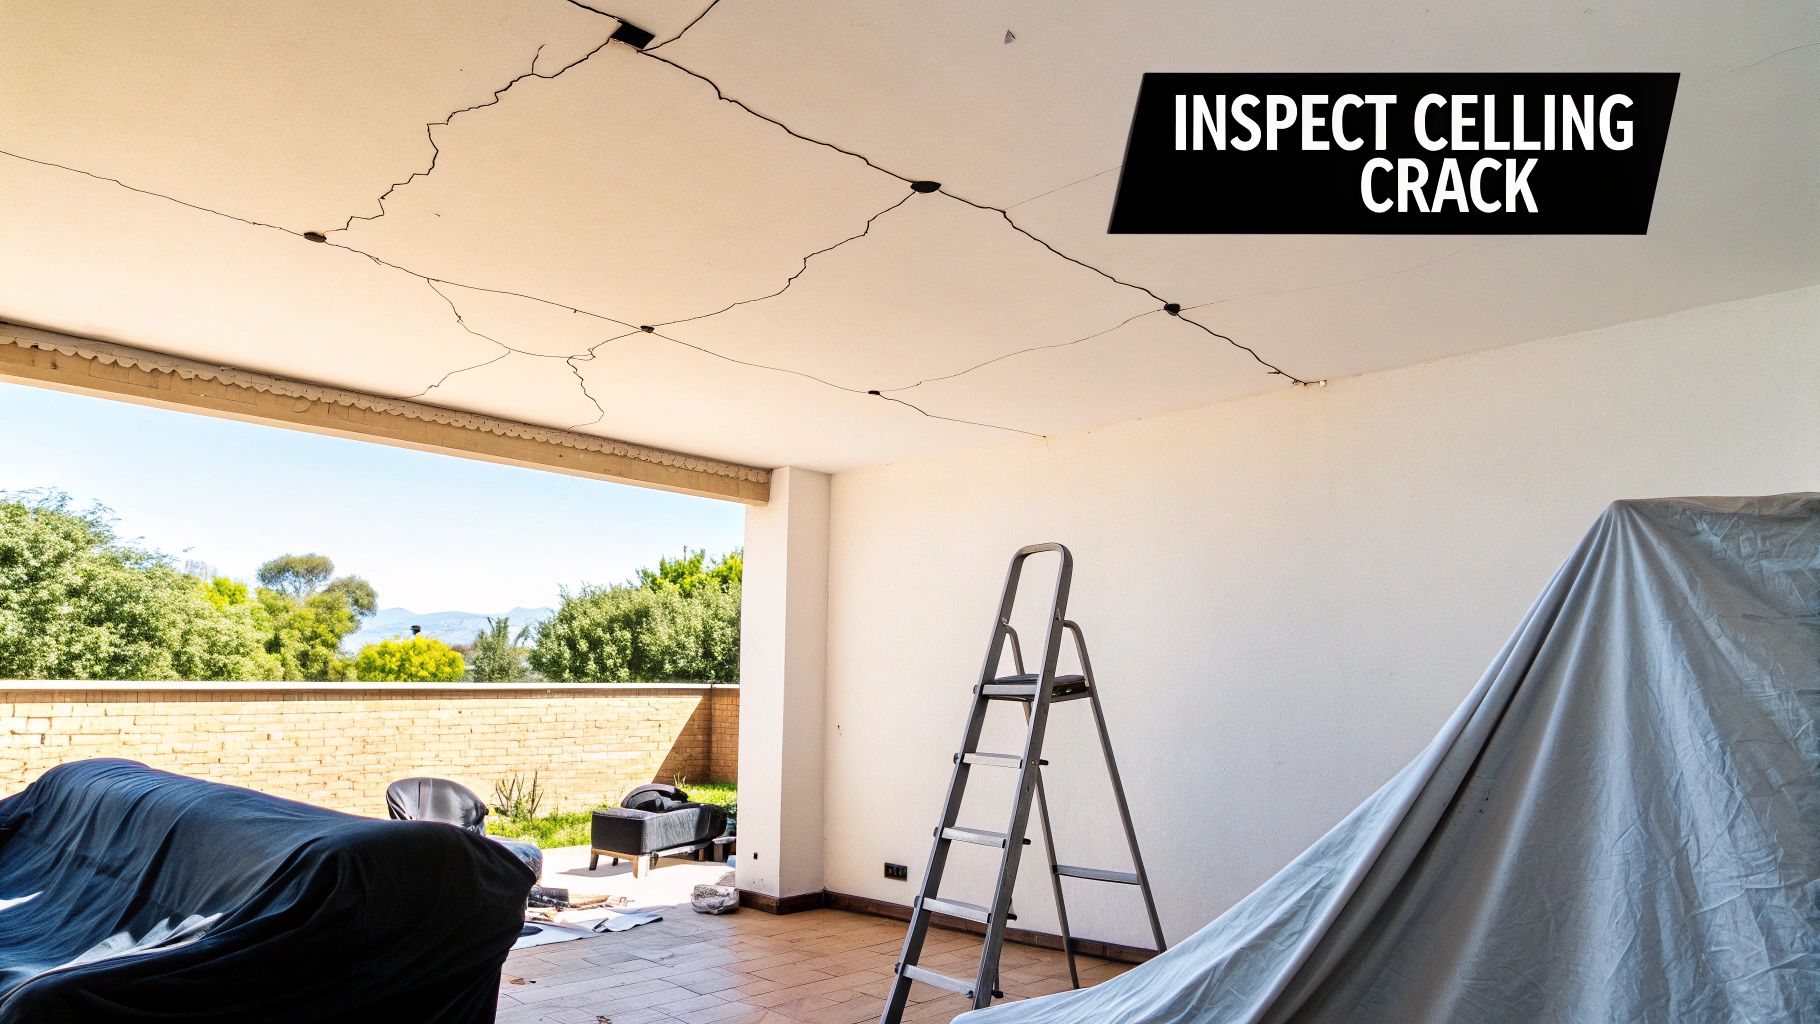
A crack in your drywall ceiling can pop up for a lot of different reasons—some harmless, others much more serious. Getting to the root cause is the key to figuring out the right fix.
Here are a few of the usual suspects:
- Natural House Settling: It's totally normal for new homes to settle a bit in the first few years. This can cause small, hairline cracks. While they aren't a huge worry, they still need to be repaired correctly to look good.
- Humidity Fluctuations: Here in South Florida, the constant swings in humidity make drywall expand and contract. That puts a ton of stress on the seams and joints, and eventually, they can crack.
- Structural Issues: This is the big one. If you see cracks that come with a sagging ceiling, doors that suddenly stick, or are wider than 1/8 inch, it could be a red flag for foundation shifts or other major structural trouble.
- Water Damage: Brownish stains around a crack are a dead giveaway of a leak from your roof or pipes. That moisture just wrecks drywall, and if you don't tackle it fast, you'll be dealing with mold.
The Risk of DIY Repairs
Drywall ceiling cracks are incredibly common, showing up in a staggering 96% of homes that use drywall interiors. While it's tempting to grab a putty knife and try to fix it yourself, those DIY attempts often end in frustration.
Here in Broward and Miami-Dade, we've seen homeowners' DIY crack repairs fail up to 70% of the time. Why? It usually comes down to improper texturing and priming, which leaves a patch that sticks out like a sore thumb once you paint. You can find more insights about drywall repair market trends in recent studies.
Leaving a crack unaddressed is never a good idea. A small problem today can escalate into a major repair involving structural work or extensive water damage remediation, costing thousands more than an initial professional assessment. For guaranteed professional results, it's best to call the experts.
The Professional Advantage
If you want a flawless, permanent solution, calling in a pro is your best bet. When you work with All Coast Painting, you get the peace of mind that comes from a fully licensed and insured team.
Our crews don't just slap some spackle on the crack and call it a day. We diagnose the cause, perform a meticulous repair, and finish the job with premium Sherwin Williams paint for a seamless result you'll never notice. For professional results that last, trust the licensed and insured experts at All Coast Painting.
Before you can even think about patching a crack in your ceiling, you have to do a little detective work. Different cracks tell different stories, and figuring out what you’re dealing with is the single most important step for a repair that actually lasts.
Let's start with the basics. If you see super-thin cracks, almost like a pencil line, you're likely looking at hairline cracks. These are incredibly common and usually pop up from minor house settling or the natural expansion and contraction of your home through the seasons. They're mostly a cosmetic headache, but you don't want to ignore them forever.
Another one I see all the time is a straight crack that runs in a perfect line. This is a dead giveaway that the drywall tape at the seam between two boards has failed. Over time, subtle vibrations and movement can be enough to weaken the joint, and a crack is the first sign of trouble.
To make this easier, here's a quick reference table to help you play detective and figure out what’s happening up there.
Identifying Common Drywall Ceiling Cracks
| Crack Type | Appearance | Common Cause | Recommended Action |
|---|---|---|---|
| Hairline Crack | Fine, thin lines, like a pencil mark. | Minor settling, humidity changes. | DIY-friendly; fill with spackle or flexible caulk. |
| Straight Seam Crack | A perfect, straight line where drywall sheets meet. | Failing or old drywall tape and joint compound. | Re-tape the joint and apply new compound. |
| Spiderweb Crack | A network of fine cracks spreading from a center. | Paint or the top layer of mud is failing. | Scrape, sand the loose material, and re-finish. |
| Discolored Crack | Any crack with a yellow or brown stain around it. | Water damage from a leak. | Find and fix the leak first, then repair the drywall. |
| Wide or Growing Crack | A crack wider than 1/4 inch that is getting longer. | Significant structural movement or settling. | Call a structural engineer or foundation expert. |
| Crack with Sagging | A crack accompanied by a bowing or dipping ceiling. | Major water damage or a serious structural issue. | Call a professional immediately. |
This table should give you a solid starting point for diagnosing the problem.
When Cracks Signal Bigger Problems
Some cracks are more than just an eyesore—they’re a warning sign. Catching these early can save you from a world of expensive headaches down the road.
Look out for spiderweb or alligator cracks. This web of tiny fractures branching out usually means the top layer of paint or joint compound wasn't applied correctly or the materials were cheap. It's a surface-level problem, but it needs to be scraped down and redone properly.
If you spot a crack with a yellow or brown stain around it, stop what you're doing. That’s the classic calling card of water damage. A leak from your roof, an upstairs bathroom, or plumbing is almost always the culprit. You absolutely must fix the source of the water before touching the drywall.
Finally, any crack paired with a sagging or bowing ceiling is a major red flag. This could mean the ceiling is so waterlogged that it’s about to fail, or it could point to a serious structural problem.
Let’s be clear: if a crack is wider than a quarter-inch, keeps getting bigger, or is on a ceiling that’s starting to dip, it's time to put the tools down. These are signs of a problem that goes way beyond drywall.
Trying to DIY a major structural issue is a recipe for disaster. For a definitive diagnosis and a flawless fix, it's best to call in the pros. The licensed and insured teams at All Coast Painting have seen it all and can pinpoint the true cause of the problem. We use premium Sherwin Williams products to make sure the final finish is completely seamless, restoring the integrity and beauty of your ceiling for good.
Alright, you've figured out what kind of crack you're dealing with. Now comes the fun part: making it disappear. While a gung-ho homeowner can certainly tackle the smaller stuff, getting a truly invisible repair is where the pros really shine. The secret isn't just in the patching—it's in the process.
What separates an obvious DIY patch from a seamless, professional finish? Preparation. It’s not about just grabbing a putty knife and some spackle. A real pro, like the team at All Coast Painting, knows that protecting your home comes first. They’ll meticulously drape your floors, furniture, and light fixtures with plastic and drop cloths to keep the dust contained.
The initial assessment is everything. This flowchart shows how pros think, guiding them from a simple hairline crack to spotting serious water damage or structural red flags.
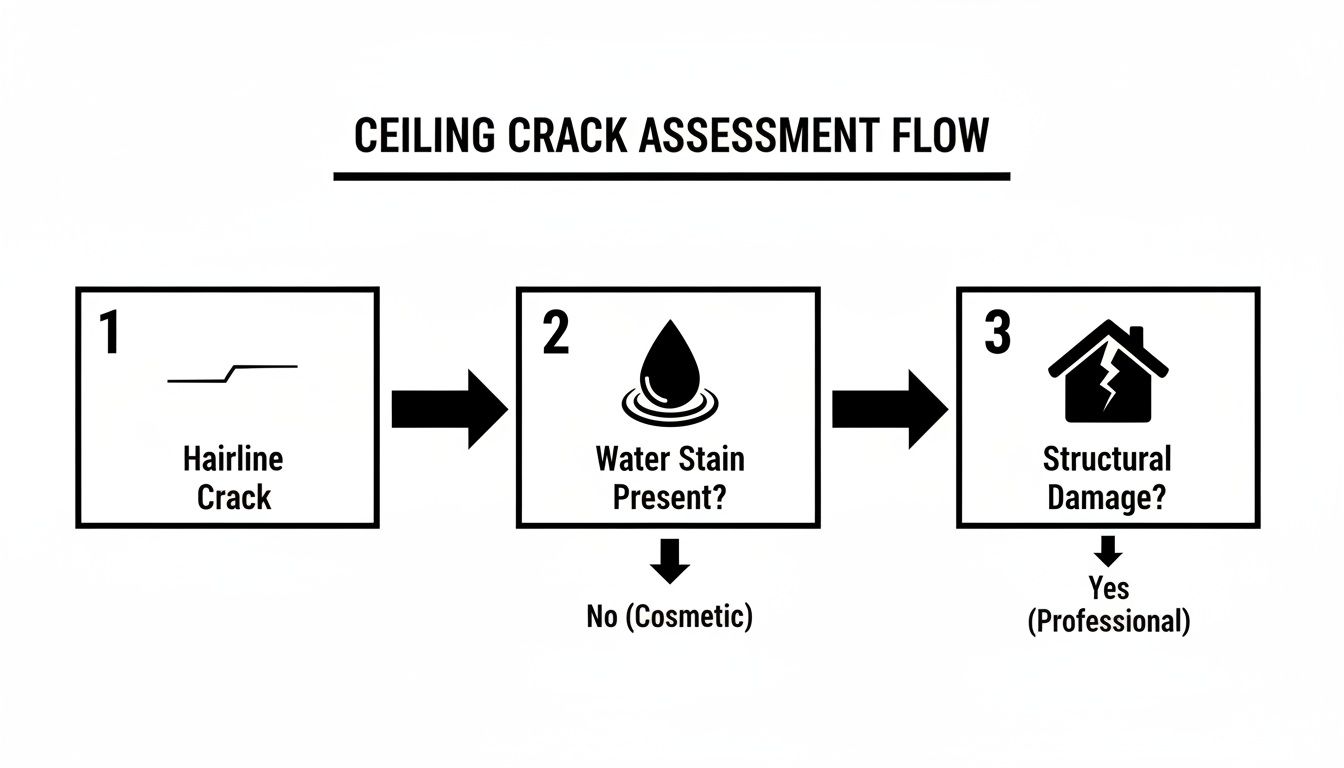
As you can see, the look of the crack itself tells you almost everything you need to know, dictating whether it's a quick fix or a sign you need to investigate further.
Prepping the Crack for a Permanent Fix
The first real step feels wrong, but trust me, it’s essential: you have to make the crack a little bigger. Take a sharp utility knife and carefully score a shallow "V" groove along the entire length of the crack. This tiny detail is the key. It creates a small channel for the joint compound to bite into, giving you a far stronger bond than just smearing mud over a paper-thin line.
Once you’ve grooved it, you have to get it perfectly clean. Any lingering dust or loose drywall bits will sabotage the repair, preventing the tape and compound from sticking properly.
Taping and Floating the First Coat
With the area prepped, you have a choice to make: fiberglass mesh tape or classic paper tape.
- Fiberglass Mesh Tape: This stuff is sticky on one side, which is handy. It’s good for patching small holes, but for a solid bond, you really need to use a setting-type compound (hot mud) for that first coat.
- Paper Tape: This is the gold standard for drywall seams and corners for a reason. It’s not self-adhesive; you embed it in a thin layer of all-purpose joint compound. Paper tape is incredibly strong and won't stretch, which is exactly what you want for reinforcing a joint.
The licensed and insured crews at All Coast Painting almost always reach for paper tape on seam cracks. It simply delivers the most durable, long-term repair. They’ll apply a thin, smooth coat of mud, press the tape in firmly, and then run a taping knife over it to squeeze out the excess and get rid of any air bubbles.
Here's a common rookie mistake: pressing too hard and squeezing all the mud out from behind the tape. You want to embed it firmly, not starve the joint. Getting that feel just right is a skill that only comes with experience.
Building Up Smooth, Feathered Layers
Once that first coat and tape are bone dry, it's time to start building up the layers. Patience is your best friend here. A pro will apply at least two more thin coats of joint compound, making each new layer just a little wider than the last. We call this "feathering," and it’s how you blend the patch invisibly into the rest of the ceiling.
Every single layer has to dry completely before you even think about adding the next one. A light sanding between coats knocks down any ridges or high spots. This methodical, multi-layer approach is the only way to repair drywall ceiling cracks so they truly vanish. Trying to rush it with one thick, heavy coat will only lead to shrinkage, more cracks, and a patch that sticks out like a sore thumb.
It’s this disciplined process that ensures the final coat of premium Sherwin Williams paint goes on smooth for a flawless, uniform ceiling.
Blending It All In: Texture and Paint for an Invisible Finish
You’ve done the hard work of filling and sanding the crack, but what you do next is what separates a DIY-looking patch from a truly professional, invisible repair. This is where the real artistry begins—making that smooth patch completely vanish into the rest of the ceiling.
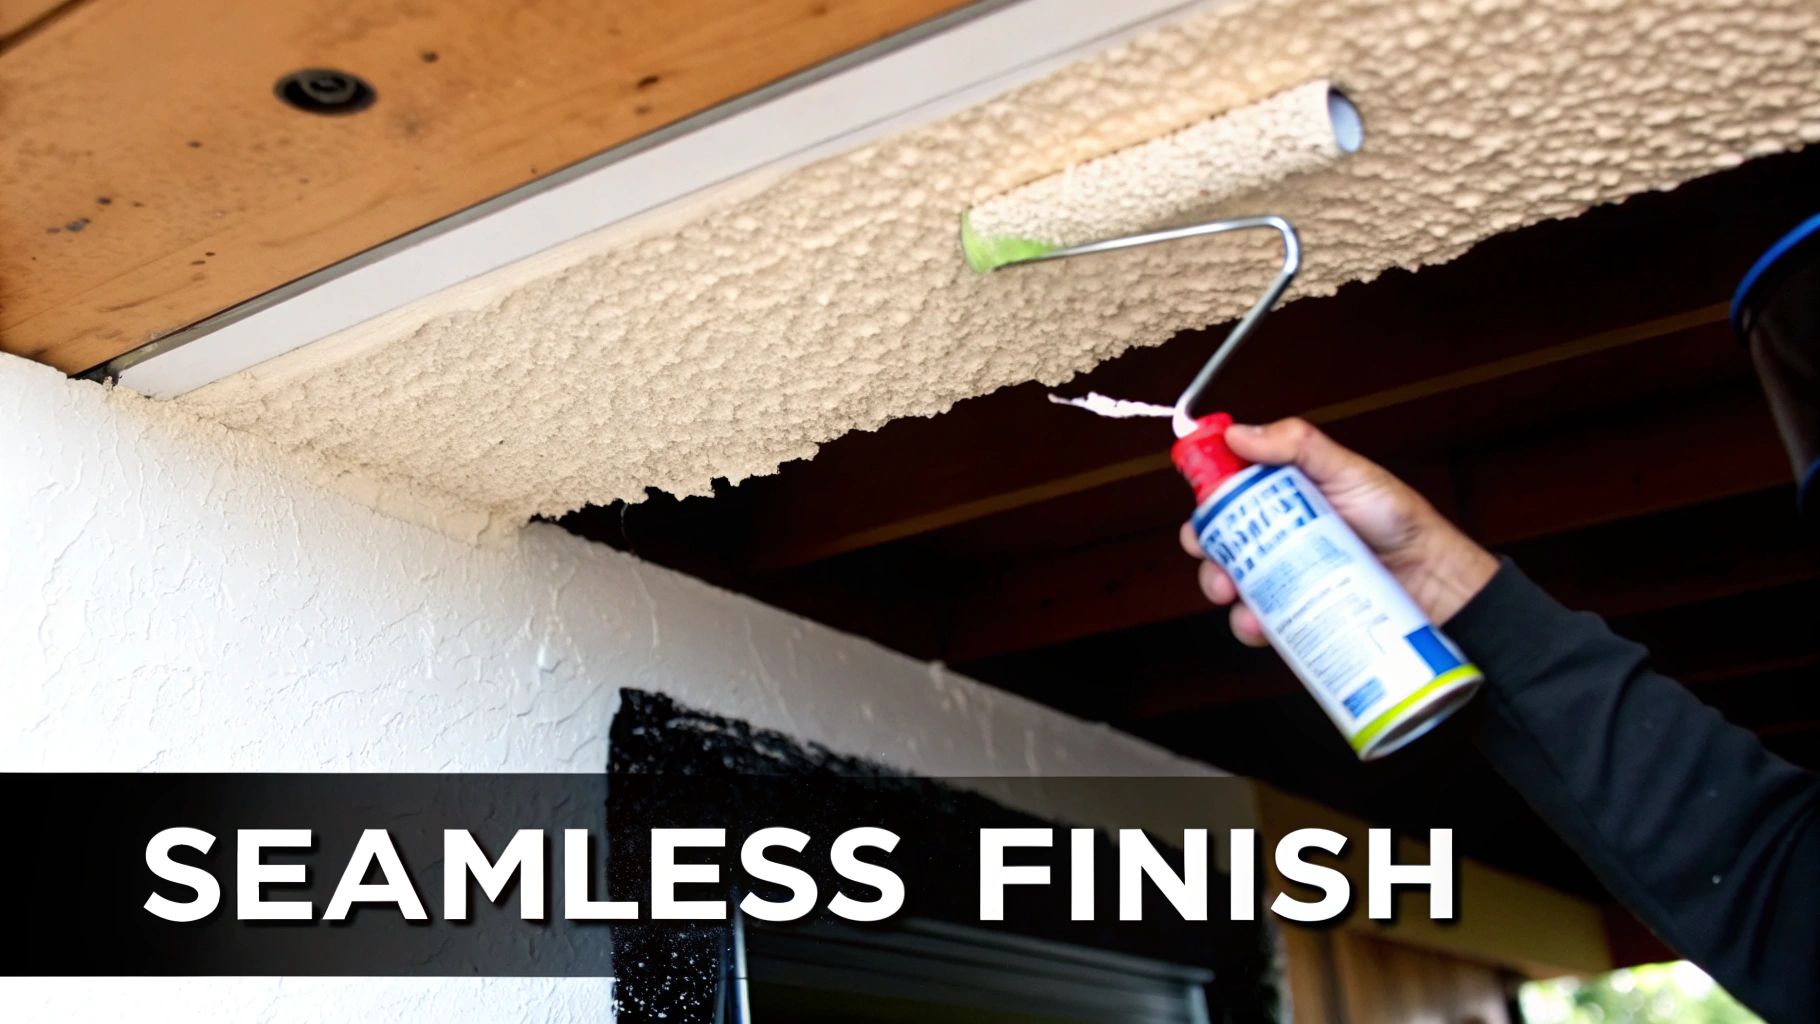
A perfectly flat, smooth spot on a textured ceiling sticks out like a sore thumb. The trick is to replicate the existing texture so perfectly that the eye just glides right over it.
The Art of Matching Ceiling Texture
Matching texture is definitely a skill, and it takes a bit of practice. The secret is to build it up in light layers instead of blasting it all on at once.
- For light textures (Orange Peel or Knockdown): Those aerosol texture sprays are your best friend for small to medium repairs. I find that using several light passes from different angles helps blend the new texture right into the old.
- For heavy textures (Popcorn): This one's a bit tougher. You'll need a specific popcorn ceiling patch product. Applying it evenly and feathering the edges without getting ugly clumps takes a steady hand.
Here's a pro tip: The real secret to a great texture match is feathering the edges. Start spraying or applying the texture directly on the patch, then lightly mist outwards, overlapping with the existing texture. This creates a gradual transition that the eye won't even register.
Priming: The Step You Absolutely Cannot Skip
Once your new texture is bone dry, you have to prime it. I can't stress this enough. Skipping primer is probably the most common DIY mistake I see, and it leads to something we call "flashing."
This is where the new patch soaks up paint differently than the surrounding ceiling, leaving a very obvious difference in sheen and color, even if you use the best paint on the market.
A good primer seals the new joint compound and texture. It creates a uniform surface so your topcoat of paint goes on evenly, making the repair of drywall ceiling cracks truly disappear.
Two Final Coats for a Flawless Ceiling
After the primer has cured, it's time for the final step: two full coats of a high-quality paint. One coat just won't cut it—it almost never gives you that rich, consistent color needed to hide minor imperfections.
At All Coast Painting, our licensed and insured crews only use premium products like Sherwin Williams paint. The better pigments and binders give you fantastic coverage and a durable finish that will last. Two coats is our standard because it guarantees a professional-grade result that makes the whole ceiling look brand new. If you'd like to see more on this, you can learn about our process for painting drywall patches.
This careful finishing process is crucial, especially for property managers and real estate investors. In competitive markets like Davie or Boca Raton, ignoring ceiling cracks can cause a 15-20% increase in tenant complaints and lower a property's value. While small cracks under 12 inches are common, bigger issues often run between $150-$500 per seam. This is where All Coast Painting LLC comes in, with trained teams who deliver precise repairs, perfect texture matching, and flawless two-coat paint finishes to protect your investment. For professional results, call All Coast Painting.
When to Call in the Pros for Ceiling Repairs
It's tempting to grab the spackle and call it a day, but some cracks are telling you a bigger story. Knowing when to step back and call a professional is key to protecting your home.
If you're dealing with a crack that won't stay fixed, is wider than a quarter-inch, or shows any signs of sagging or water stains, it's time to get an expert opinion. For professional results, it's time to call All Coast Painting.
A quick DIY patch might cover up the symptom, but it won't solve the underlying problem. That cosmetic fix could be hiding a serious structural issue or a slow, hidden leak that's causing far more damage than you can see.
Why a Professional Assessment Matters
Bringing in a team like All Coast Painting is about more than just getting the crack fixed—it’s about getting an accurate diagnosis and lasting peace of mind. Our licensed and insured crews don't just jump into repairs. We start with a precise, no-obligation estimate to make sure you know exactly what’s going on.
Our goal isn't just to patch the crack; it's to find out why it happened in the first place.
We also know that having work done in your home can be disruptive. That's why we take great care to protect your property, covering every piece of furniture and all your flooring to keep dust and debris contained. It’s that level of respect for your home that sets a professional service apart.
Choosing a professional isn't just about a cleaner finish. It's an investment in your home's health. A pro can spot and fix the root cause, stopping cracks from coming back and protecting your property value.
Getting a Flawless, Long-Lasting Finish
The demand for quality repairs is on the rise. In fact, the market for drywall crack repair is projected to grow from $5.2 billion in 2024 to $8.9 billion by 2033. For homeowners, this underscores how important it is to handle these issues correctly. A timely, expert repair can prevent a small crack from turning into a full ceiling replacement, a project that can easily cost $500 to $2,000.
When you hire All Coast Painting, you’re getting a team that sees the job through from start to finish. Our supervised crews manage everything from the detailed prep work to applying the final coat of premium Sherwin Williams paint.
This all-in-one approach guarantees a seamless, invisible repair that blends perfectly with your ceiling. It’s how we’ve earned 98% customer satisfaction and a reputation for quality results. You can learn more about our dedicated approach to drywall crack repairs and see why so many homeowners trust us to get the job done right.
Common Questions About Drywall Ceiling Repair
Even with the best guide, a few questions always pop up before you start tackling those ceiling cracks. Let's run through some of the things homeowners ask us all the time.
How Long Does a Professional Ceiling Crack Repair Take?
You should plan for the repair to take about 2-3 days. It's not because the work itself is slow, but because the materials need time to do their job. Joint compound, primer, and paint all need to cure properly between coats.
At All Coast Painting, our licensed and insured teams follow a very deliberate process. We let each layer dry completely to ensure the repair is strong and truly invisible. Rushing it is the number one reason DIY repairs fail a few months down the line.
Can I Just Paint Over a Hairline Crack?
I get this question a lot. Painting over a crack is really just a temporary cover-up. Think of it like a sticker—it hides the problem, but it doesn't fix it. The crack is a physical break in the drywall, and paint simply doesn't have the strength to bridge that gap. Inevitably, the crack will show through again.
For a permanent fix, you have to address the structural issue. That means properly taping the seam and filling the crack with joint compound to create a solid, stable surface before you even think about painting.
Why Is It Important to Hire a Licensed and Insured Company?
Hiring a licensed and insured company like All Coast Painting is your best protection. A license is proof that a team has met the industry standards for skill and knowledge. More importantly, insurance protects you from any liability if an accident happens on your property.
This combination is your guarantee of a professional job. When our crew shows up to apply a fresh coat of premium Sherwin Williams paint, you can relax knowing everything is being handled correctly and safely. If you want to learn more about getting that perfect finish, check out our guide on how to paint ceilings without streaks.
Ready to make those ceiling cracks disappear for good? For a flawless finish backed by professional expertise, contact All Coast Painting LLC today for your free, no-obligation estimate. Visit us at https://www.allcoastpainting.com to get started.
