

If you want to know how to paint trim and baseboards like a pro, the secret isn't in the brush strokes—it’s all in the prep work. It really boils down to three things: thoroughly cleaning the surface, sanding it smooth, and then using a top-notch primer and paint, like a quality Sherwin-Williams product, for a finish that lasts. For guaranteed professional results, the licensed and insured teams at All Coast Painting have the process perfected.
Laying the Groundwork for a Flawless Finish
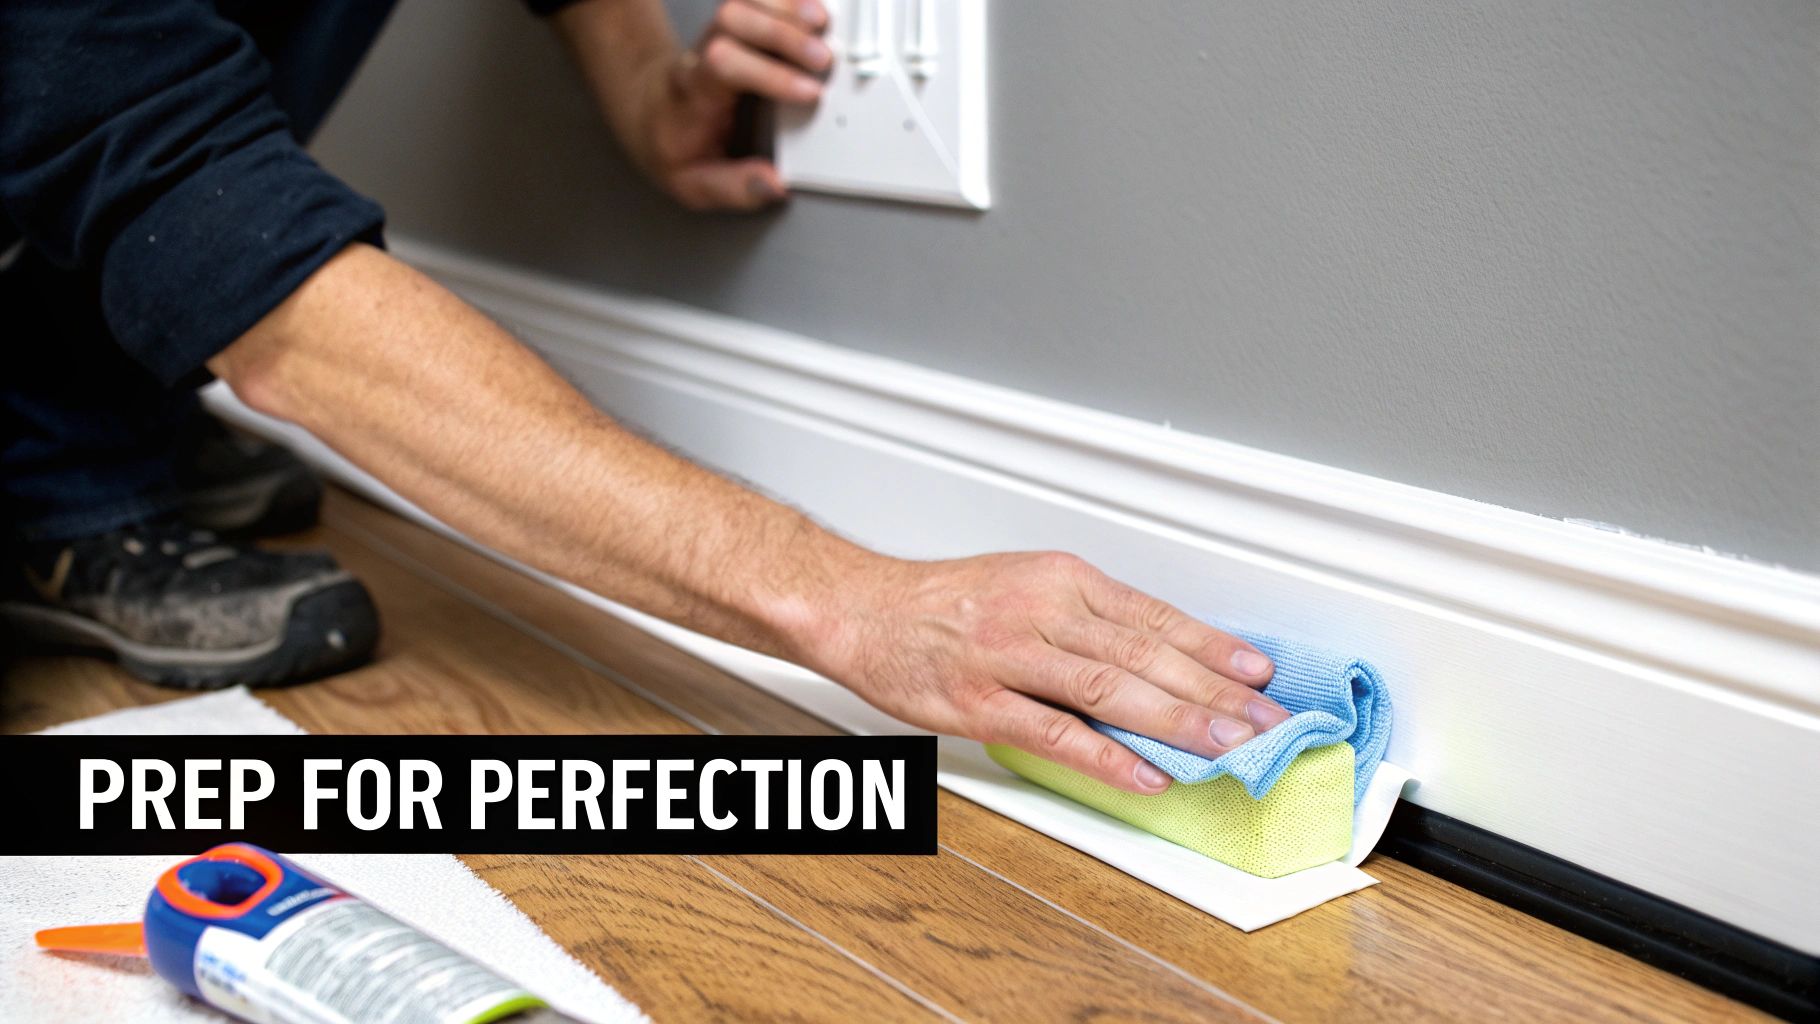
A stunning paint job isn’t created with the final coat. It's built, layer by layer, during the prep phase. Honestly, this is where you can instantly tell the difference between a rushed DIY job and a true professional finish. Our licensed and insured teams at All Coast Painting know from experience that what happens before a can of Sherwin-Williams paint is even opened dictates the quality and lifespan of the entire project. For professional results that last, calling All Coast Painting is your best first step.
Start With a Deep Clean
Think about it—over the years, trim and baseboards are magnets for dust, grime, scuff marks, and oils. If you paint right over that, you're just asking for the new paint to peel and chip down the road.
First, grab a vacuum with a brush attachment and get rid of all the loose dust and cobwebs. Then, a simple mix of mild soap and warm water is usually all you need. Wipe down every inch of the trim with a microfiber cloth. If you're working in a kitchen or bathroom where grease can build up, you might need a dedicated degreaser to get the surface truly clean. Just make sure everything is completely dry before you move on.
The Importance of Sanding and Filling
With a clean slate, it's time to create that perfectly smooth surface. Even if the old paint looks okay, you can’t skip a light scuff-sanding. We use 180- to 220-grit sandpaper to gently dull the old finish. This isn't about removing the old paint; it's about creating a "tooth" for the new primer and paint to grab onto, which guarantees a much stronger bond.
Now, look closely at your trim. See any nail holes, dents, or little cracks? A good quality wood filler and a flexible putty knife will make those disappear. For the gaps you see between the trim and the wall, a paintable caulk is your best tool. A clean, smooth bead of caulk creates those sharp, seamless lines that really make the final job look polished. If you find more serious damage, you may want to check out our light carpentry services before you go any further.
A truly professional finish is all in the details. Spending extra time on sanding, filling, and caulking is a non-negotiable step that our licensed and insured crews at All Coast Painting master on every project. It's the foundation of a paint job that lasts.
Gearing Up: Choosing Your Tools and Materials Like a Pro
Walking into the paint aisle can be overwhelming, I get it. But grabbing the right tools from the get-go is the secret to getting that perfect, long-lasting finish on your trim and baseboards. It's not just about making the job easier; it's about the quality of the final product. For truly professional results, you can call the licensed and insured teams at All Coast Painting to handle it all for you.
The link between good tools and great results is undeniable. In fact, the global market for painting tools is expected to jump from USD 11.8 billion in 2025 to a whopping USD 18.1 billion by 2035. Why the boom? Because everyone, from pros to homeowners, is realizing that precision and efficiency matter. That's exactly why our licensed and insured crews at All Coast Painting always reach for tools like ergonomic brushes with high-quality synthetic bristles—they hold more paint, cut down on drips, and make the whole process smoother. You can read more about the growth of the painting tool market if you're curious.
Your Essential Shopping List
If you want professional results, you need the right gear. This is not the time to grab the cheapest, most disposable options. Investing a few extra dollars in quality tools will pay off with clean lines and a beautiful, smooth surface. Here's what you absolutely need:
2.5-Inch Angled Sash Brush: This is your MVP for precision work. The angled bristles give you incredible control for "cutting in"—painting those crisp, sharp lines along walls, ceilings, and floors that scream "professional job."
4- to 6-Inch Mini Roller: Got wider, flat trim or baseboards? A quality mini roller with a foam or microfiber cover is your best friend. It lays down paint quickly and evenly, leaving a flawless, spray-like finish without a single brush stroke in sight.
Premium Painter's Tape: Seriously, don't skimp on the tape. A top-tier brand like FrogTape or 3M ScotchBlue creates a rock-solid seal that stops paint from bleeding underneath. It's one of the simplest, smartest investments for guaranteeing clean edges.
A Quick Look at DIY vs. Pro-Grade Tools
You might wonder if the tools the pros use really make that much of a difference. They absolutely do. Here’s a quick comparison of what a typical DIY toolkit looks like versus the professional-grade equipment our teams at All Coast Painting bring to every job.
DIY vs Professional Grade Painting Tools
| Tool/Material | Common DIY Choice | All Coast Painting Professional Standard | Why It Matters |
|---|---|---|---|
| Paint Brush | Basic, all-purpose synthetic brush | Wooster or Purdy 2.5" angled sash brush with premium filaments | Superior bristle design provides razor-sharp lines, holds more paint, and eliminates shedding for a flawless finish. |
| Roller | Standard 9" roller with a cheap nap cover | High-density foam or microfiber mini-rollers (4-6 inch) | Mini-rollers are sized for trim and leave an ultra-smooth, spray-like finish with no stippling or texture. |
| Painter's Tape | Generic blue or masking tape | 3M ScotchBlue or FrogTape with PaintBlock Technology | Premium tapes create a much sharper seal, preventing paint bleed and resulting in perfectly crisp, clean lines. |
| Paint | All-in-one "paint and primer" latex | Sherwin-Williams ProClassic Interior Acrylic Latex Enamel | Professional enamel paint is engineered for durability, providing a hard, scuff-resistant finish that's easy to clean. |
As you can see, investing in better tools isn't just about making the job easier—it's about ensuring the quality and longevity of your work.
Picking the Perfect Paint
The paint you choose is just as critical as the brush you apply it with. Color gets all the attention, but the paint's formula and sheen are what truly determine how it looks and, more importantly, how it holds up.
For high-traffic, high-impact areas like trim and baseboards, durability is everything. These surfaces get knocked around by vacuums, scuffed by shoes, and bumped by furniture. You need a paint that can take the abuse.
This is exactly why our teams at All Coast Painting almost exclusively use Sherwin-Williams enamel paints, like their ProClassic Interior Acrylic Latex Enamel. These formulas are designed to dry to a hard, tough finish that resists wear and tear and is a breeze to wipe clean.
A semi-gloss or satin sheen is usually the best choice. It offers a subtle luster that makes the architectural details of your trim pop while providing excellent washability. Making the right paint selection is a huge step, and you can dive deeper with our guide on choosing the right interior paint colors for your home. Of course, if you want guaranteed professional results without any of the guesswork, calling our licensed and insured teams ensures your project is done right with the best Sherwin-Williams materials for a flawless, lasting finish.
Executing the Perfect Paint Application
Okay, you've put in the hard work—cleaning, sanding, and masking. Now comes the satisfying part: laying down that fresh coat of paint. This is the moment where all that careful prep pays off, turning your trim from an afterthought into a sharp, defining feature of the room. The right technique here is what separates a decent DIY job from a truly professional finish.
This workflow is exactly how our pro teams tackle trim to get those flawless results.
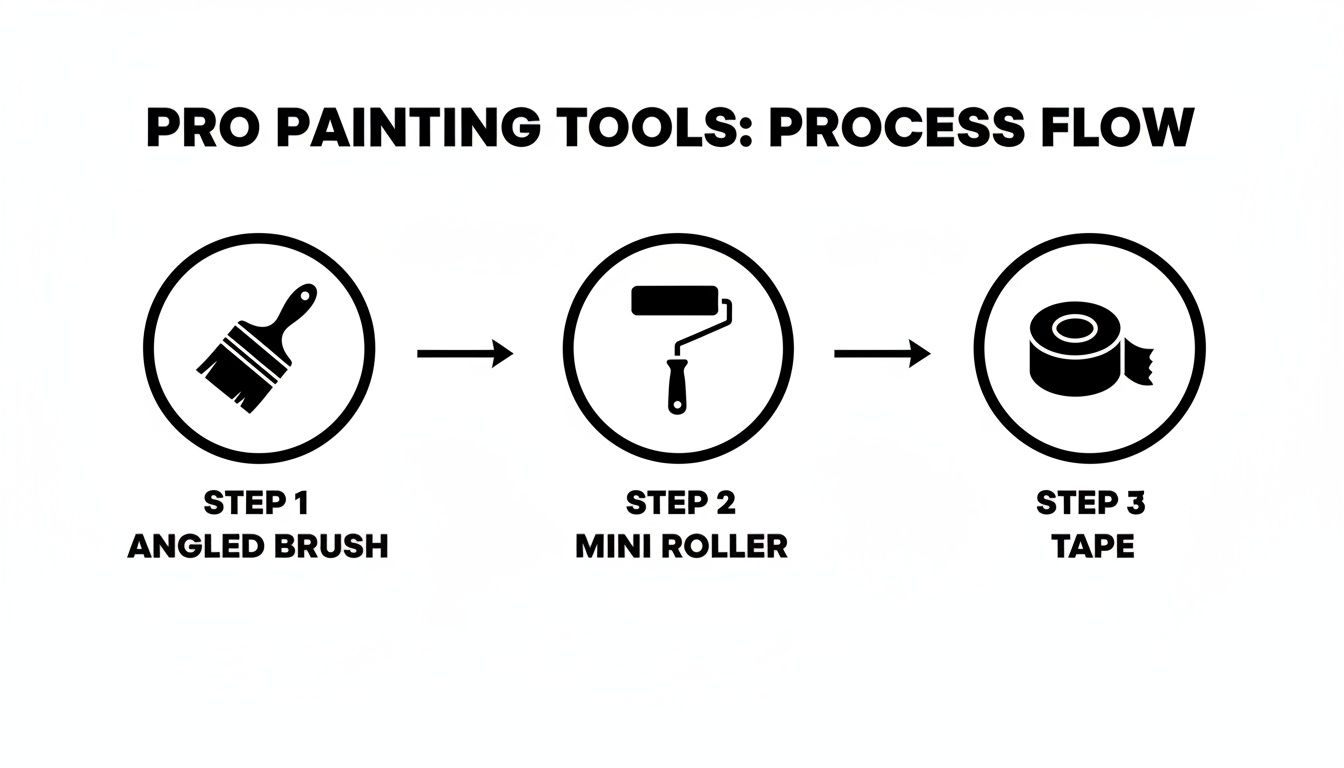
It’s all about using the right tool for the job: a precision angled brush for the edges, a mini roller for the flat surfaces, and quality tape to guarantee those crisp, clean lines.
The Power of Primer and Quality Paint
Don't even think about skipping the primer. Our licensed and insured teams at All Coast Painting never do, and for good reason. Primer is the essential bridge between the trim's surface and your topcoat. It seals porous materials like raw wood, stops old stains or dark colors from bleeding through, and gives the paint something to really grab onto. A good prime job is your best defense against chipping and peeling later on.
Once you’re primed, the quality of your paint does the rest of the heavy lifting. The global paints market is a massive USD 193.91 billion industry for a reason—demand for high-performance coatings is huge. We stick with premium Sherwin-Williams enamels because we’ve seen firsthand how they outperform the competition. Industry data shows top-tier paints like these can last 5-10 times longer than a cheap, single-coat paint job.
Professional Application Techniques
Getting that smooth, almost factory-sprayed look is less about speed and more about a methodical approach. It’s all in the technique.
Cutting In with an Angled Brush: Grab a quality angled sash brush—it makes a world of difference. Load it up and glide it along the edges where the trim meets the wall or floor. A steady hand helps, but a great brush does half the work for you.
Always Keep a "Wet Edge": This is the single best trick to avoid brush marks. Always paint from the wet area you just finished back into the dry, unpainted section. This lets the paint flow together and level out naturally as it dries, leaving a seamless finish.
Roll the Flats: For any wider, flat parts of your baseboards or trim, switch to a mini roller with a foam or microfiber cover. It lays down paint quickly and leaves a beautifully uniform surface with zero brush strokes.
Here’s a core rule of professional painting: two thin coats will always beat one thick one. A heavy coat looks sloppy, drips easily, takes forever to cure, and just isn’t as durable. Two properly applied thin coats give you much better color depth and a harder, more resilient finish.
Ultimately, mastering how to paint trim and baseboards comes down to patience and using the right methods. If you’re after guaranteed perfect results without the learning curve, calling our licensed and insured teams at All Coast Painting is always the best bet. We bring the expertise and the best Sherwin-Williams materials to get the job done right.
If you found this useful, you should check out our guide on how to paint a room like a professional.
Mastering the Final Touches and Cleanup

A truly professional paint job isn't finished until the last piece of tape is gone and your space is spotless. These final steps are what really separate a good result from a great one.
The moment you pull away the painter’s tape to reveal that perfectly crisp line is one of the best parts of the job. But there’s a trick to it. You need to remove the tape while the last coat of paint is still a little wet or tacky. If you wait until it’s fully dry, the paint can form a film right over the tape, and you risk peeling off your hard work along with it.
When you're ready, pull the tape slowly and at a 45-degree angle away from the trim. If you waited too long and the paint starts to lift, stop. Carefully score the edge where the paint meets the tape with a utility knife before you continue peeling.
Preserving Your Tools for Future Projects
Don’t just toss your expensive brushes and rollers when you're done. Cleaning them properly means they’ll be ready for your next project. For latex paints, like the premium Sherwin-Williams products we use, cleanup is simple with just some soap and warm water.
- For Brushes: Work the soap into the bristles under running water until it runs clear. A painter's comb or wire brush is great for getting stubborn paint out from near the ferrule (the metal band).
- For Rollers: First, scrape as much excess paint as you can back into the can with a 5-in-1 tool. Then, use a roller cleaning tool under the faucet to rinse the cover thoroughly.
Once they're clean, reshape your brush bristles by hand and hang them to dry. Roller covers should be stored standing on end so the nap doesn’t get matted down on one side.
Don’t let the stress of achieving a flawless finish and dealing with the cleanup overwhelm you. For a guaranteed perfect result without the hassle, the licensed and insured teams at All Coast Painting handle every detail from prep to the final walkthrough, leaving you with nothing but a beautifully transformed space.
Ultimately, the cleanup and final touches are just as important as the painting itself. It's the mark of true craftsmanship. While these tips will help you get a polished, professional look, you can always call All Coast Painting if you'd rather skip the tedious work and get professional results.
When to Call in the Painting Pros
Look, there's a certain pride that comes from a DIY project done right. But let’s be honest—getting trim and baseboards absolutely perfect is a whole different ball game. It takes more than just a can-do attitude.
Sometimes, the sheer size of the job, the intricate details of your trim, or just the desire for a flawless, factory-like finish makes calling in an expert the smartest play. This is where a professional team like All Coast Painting turns what could be a stressful, week-long chore into a completely hands-off experience for you.
Time is usually the biggest reality check. A proper DIY job, from taping every edge to the final coat and cleanup, can easily eat up your entire weekend, if not longer. Our licensed and insured crews, on the other hand, have this down to a science. We bring a level of efficiency that transforms a lingering headache into a project that’s done right, and done on time. For truly professional results, you should call All Coast Painting.
The All Coast Painting Advantage
Choosing to work with us is really an investment in quality and your own peace of mind. We get it—your home is your biggest asset, and we treat it that way.
- Total Preparation: We take care of everything. That means carefully moving furniture, covering floors, and protecting every surface. You don’t have to do a thing.
- Top-Tier Materials: We use premium products like Sherwin-Williams paint because they deliver an incredibly durable, smooth finish that can handle the bumps and scuffs of daily life.
- A Finish You'll Love, Guaranteed: Before we pack up, we do a final satisfaction walkthrough with you. The job isn’t finished until you’re 100% happy with how it looks.
This all-in approach means you get to enjoy the beautiful results without any of the mess or stress that comes with doing it yourself.
Handing a project over to a professional team isn't just about saving time—it's about ensuring the job is done right the first time with the best materials, providing a durable, beautiful finish that adds real value to your home. Call All Coast Painting for professional results you can trust.
A Smart Investment for Your Property
For homeowners in Broward and Miami-Dade, hiring professional painters can have a real financial upside. When an insured crew like All Coast Painting masterfully handles every detail—from prep and priming to two perfect finish coats—it can measurably boost your property value.
In fact, crisp, professionally painted trim can increase a home's value by up to 5-7% in real estate flips because it signals quality and attention to detail to potential buyers. In our fast-moving local market, investing in expert work now helps you sidestep the common 20-30% repaint costs that often come from DIY missteps. You can learn more about how quality coatings impact the market and add value. Whether it's your Hollywood condo or a Boca Raton office, the finish will gleam with precision.
Ultimately, the choice comes down to what you value most. If your goal is a perfect, long-lasting finish without giving up your weekends and your sanity, then partnering with the pros at All Coast Painting is the clear answer. Our teams deliver premium workmanship and a worry-free experience, leaving you with nothing but gorgeous trim and baseboards.
Common Questions About Painting Trim

Even with the best plan, a few questions always pop up when you're in the middle of a trim painting project. Getting the right answers can be the difference between a job that looks good and one that looks truly professional. Let's tackle some of the most common ones we hear.
What Is the Best Paint Finish for Trim?
For trim, baseboards, and doors, you really can't beat a semi-gloss or satin finish. There’s a good reason it's the industry standard. These sheens are built for durability, standing up to scuffs and bumps in high-traffic areas. Plus, they're much easier to wipe clean than a flat or eggshell paint.
Here at All Coast Painting, our licensed and insured crews almost exclusively use premium Sherwin-Williams enamels in a semi-gloss sheen. It gives you a hard, resilient surface that looks polished and holds up to the reality of daily life, keeping our clients' homes looking sharp for years.
Do I Really Have to Sand Before Painting?
Yes, and this is one step you can't afford to skip. When you give the surface a light scuff-sanding with 180-220 grit sandpaper, you're doing two critical things. You're smoothing out minor imperfections, but more importantly, you're knocking down the gloss of the old paint. This creates a slightly rougher "profile" for the new primer and paint to bite into.
Honestly, skipping the sanding is the number one reason we see paint fail—it just peels and chips right off. Our professional teams at All Coast Painting meticulously prep every single inch to guarantee that flawless, lasting bond.
How Long Should I Wait Between Paint Coats?
Patience is your best friend here. It’s always tempting to rush and get that second coat on, but putting it on too soon can actually pull up the first layer, leaving you with a tacky, uneven mess.
For most quality latex paints, like the ones from Sherwin-Williams, you’ll want to wait at least 2 to 4 hours between coats. Always, always check the directions on the can. Things like humidity and temperature can really change the drying time.
Can I Paint Just the Trim Without Painting the Walls?
Absolutely! A fresh coat of paint on the trim is a fantastic, high-impact way to make a room feel cleaner and make your wall color pop. The real key to making this work is your prep, specifically your taping.
Use a high-quality painter’s tape and run a putty knife along the edge to press it down firmly. This creates a super tight seal that stops paint from bleeding underneath, giving you that perfectly crisp, clean line every single time. For professional results every time, you can always call All Coast Painting.
Achieving a flawless, durable finish takes time, skill, and the right pro-grade materials. If you’d rather hand the work over to the experts, contact All Coast Painting today. We offer a free, no-obligation estimate, and our licensed and insured teams will deliver the professional results your home deserves. Visit us at https://www.allcoastpainting.com.
